
7 DIY Cat Patio Ideas That Give Your Cat Safe Outdoor Time

If your cat spends half the day staring out the window, a cat patio DIY project might be exactly what she is asking for. These enclosed outdoor patios — catios — give indoor cats fresh air, sunshine, and bird-watching without the dangers of roaming free. And they do not have to look like an ugly cage bolted to your deck.
These 7 ideas range from a mesh pergola you can sit in with your cat, to a renter-friendly balcony setup that goes up in an afternoon. Each is a weekend-scale build with a real materials list. Pick the one that fits your space.
Table of Contents
- 1. Enclosed Pergola Patio With Mesh Panels
- 2. Steel-Frame Cube Catio With Hammock and Tunnel
- 3. Two-Story Wooden Catio With Interior Ramp
- 4. Window-Connected Two-Story Catio
- 5. Dual-Section Catio With Staggered Shelves
- 6. Renter-Friendly Balcony Screen Patio
- 7. Corner Deck Catio With Wall Cat Flap
1. Enclosed Pergola Patio With Mesh Panels
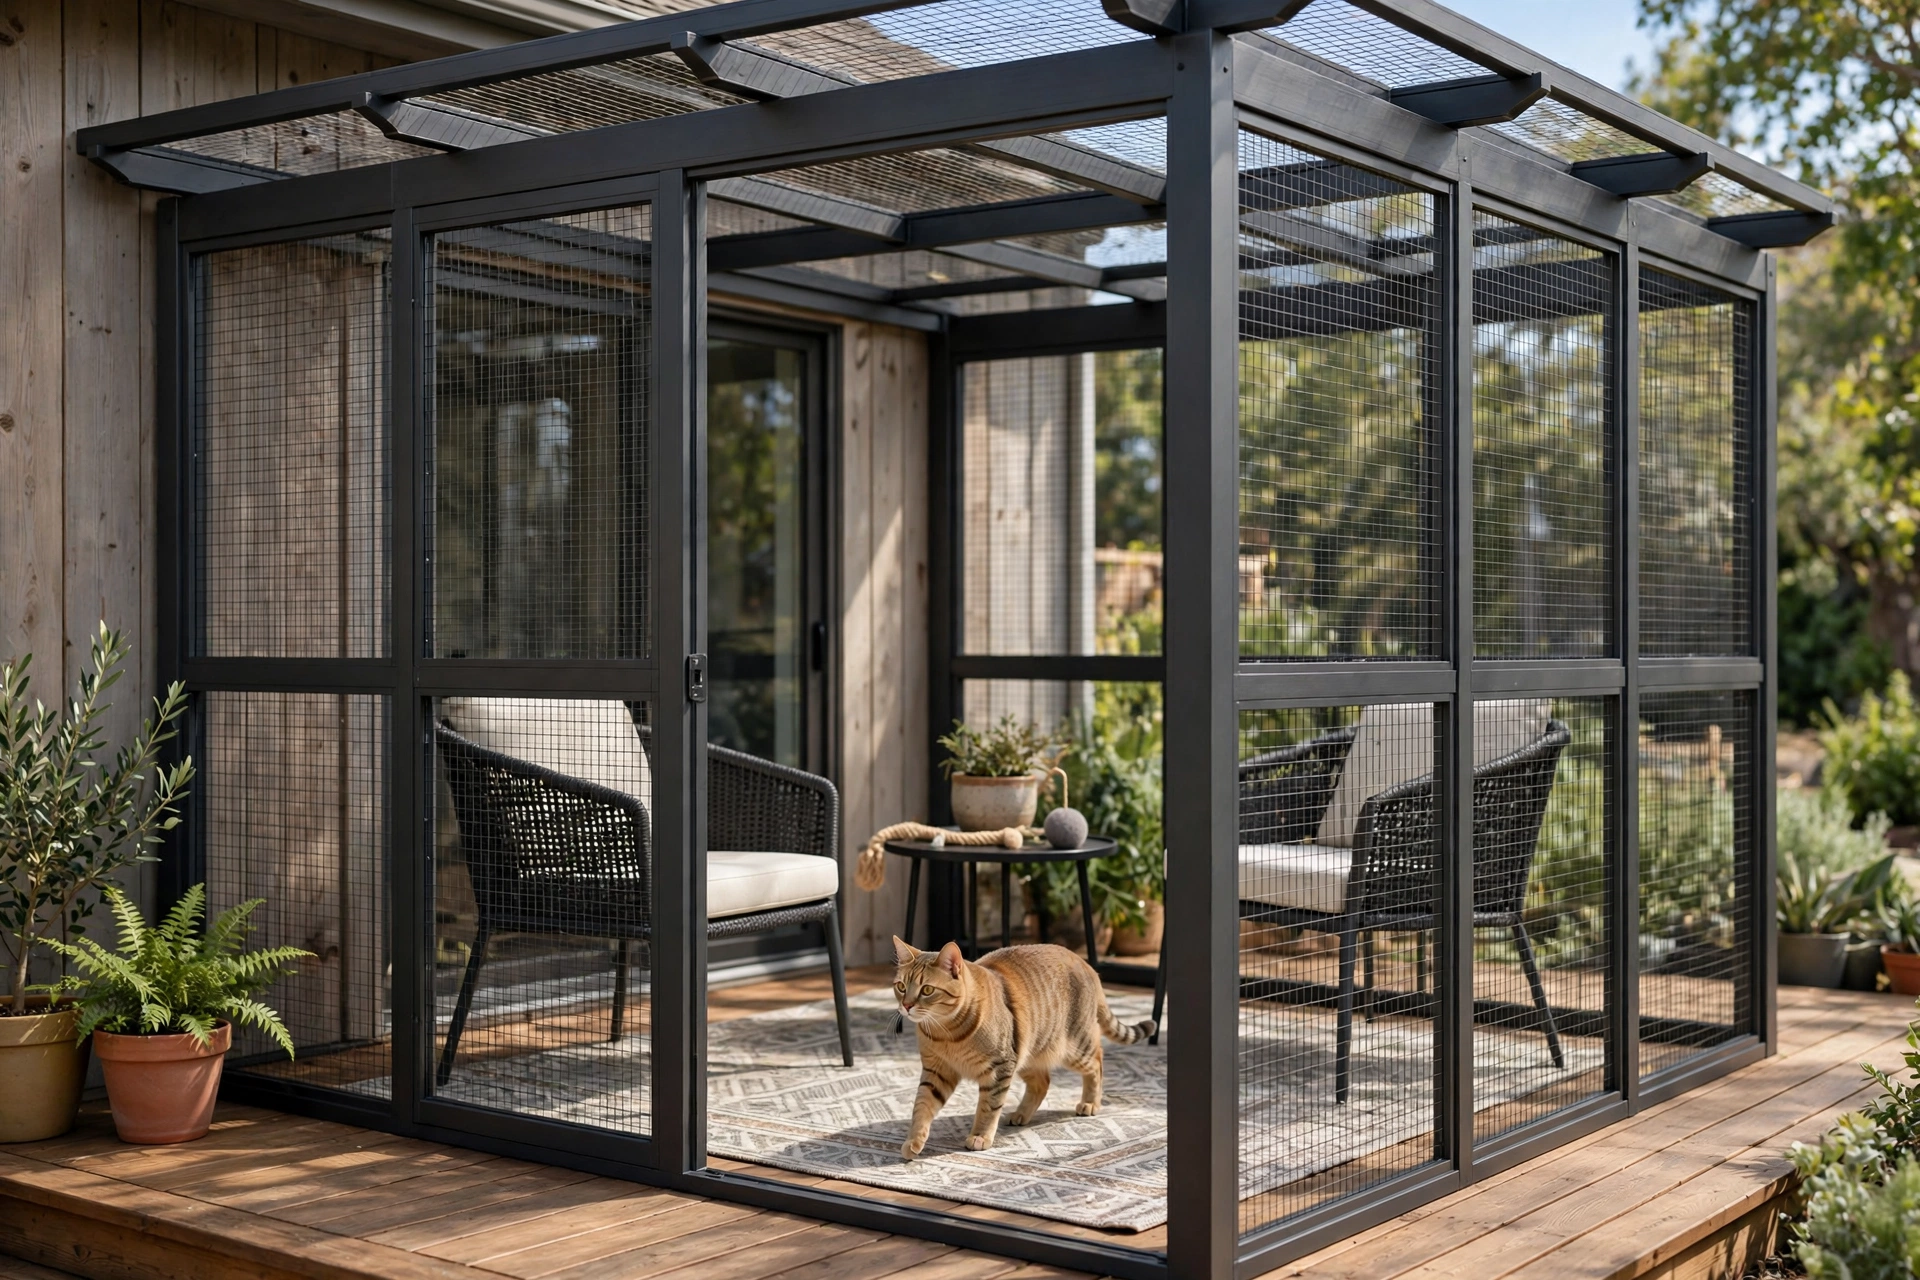
Turn a standard aluminum pergola into a screened cat patio by wrapping every open side in wire mesh. The louvered roof gives shade and rain protection, and it is roomy enough for outdoor chairs, so you sit outside with your cat.
What You’ll Need: aluminum pergola frame (10 x 10 ft works well), galvanized welded wire mesh with 1/2-inch grid, stainless steel clips, drill, wire cutters, measuring tape.
How to Build It:
- Assemble the pergola frame and anchor it to the deck or patio.
- Measure each open side and cut the wire mesh panels to size, leaving a couple of inches of overlap at the posts.
- Pull the mesh taut and clip it to each post every 6 inches, working from the bottom up. Add a rug and a scratching post inside.
Time & Skill: About 6–8 hours. Intermediate — the frame assembly is the hardest part.
Helpful pick: Fencer Wire Galvanized Hardware Cloth — a sturdy welded wire mesh for wrapping pergola sides.
2. Steel-Frame Cube Catio With Hammock and Tunnel
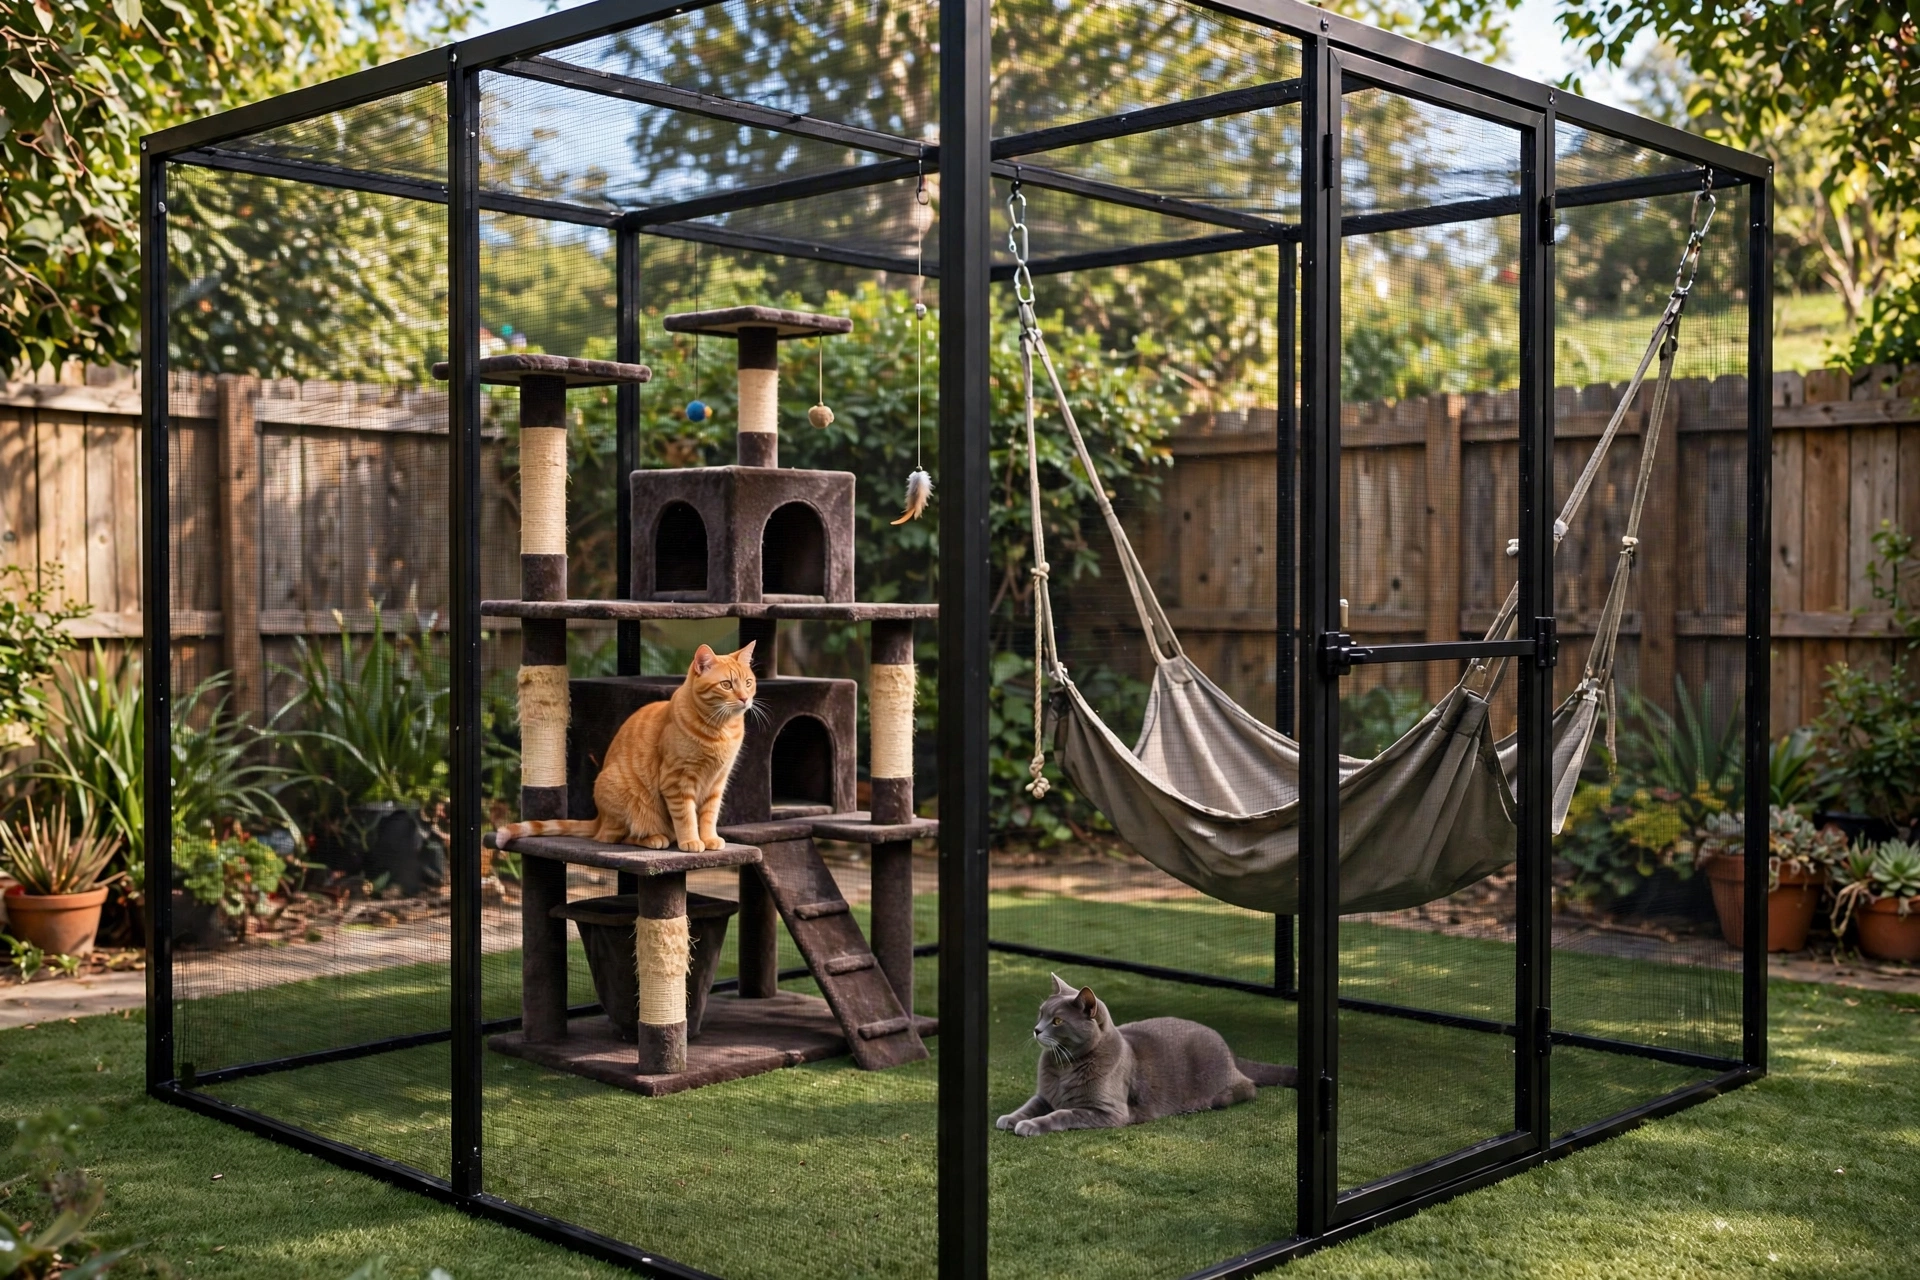
A freestanding 6 x 6 x 6 foot cube gives your cats climbing space, a hammock, and a tunnel — without attaching anything to your house. Knotted nylon netting keeps it fully escape-proof while letting the breeze through.
What You’ll Need: square steel frame tubing (twelve 6-ft lengths) with corner brackets, heavy-duty knotted nylon netting (1.5-inch mesh), artificial turf mat, small multi-level cat tree, hanging mesh hammock, fabric play tunnel and zip ties.
How to Build It:
- Bolt the steel tubing into a cube frame and check that it is level before tightening everything.
- Stretch the netting over all four sides and the top, zip-tying it every 6 inches along each frame edge.
- Lay the turf mat across the floor, then place the cat tree off-center, clip the hammock in an upper corner, and roll the tunnel out along one side.
Time & Skill: About 6–8 hours. Intermediate — stretching netting taut is the trickiest step.
Helpful pick: PAWISE Cat Safety Net — a heavy-duty mesh net for fully enclosing a freestanding catio frame.
3. Two-Story Wooden Catio With Interior Ramp
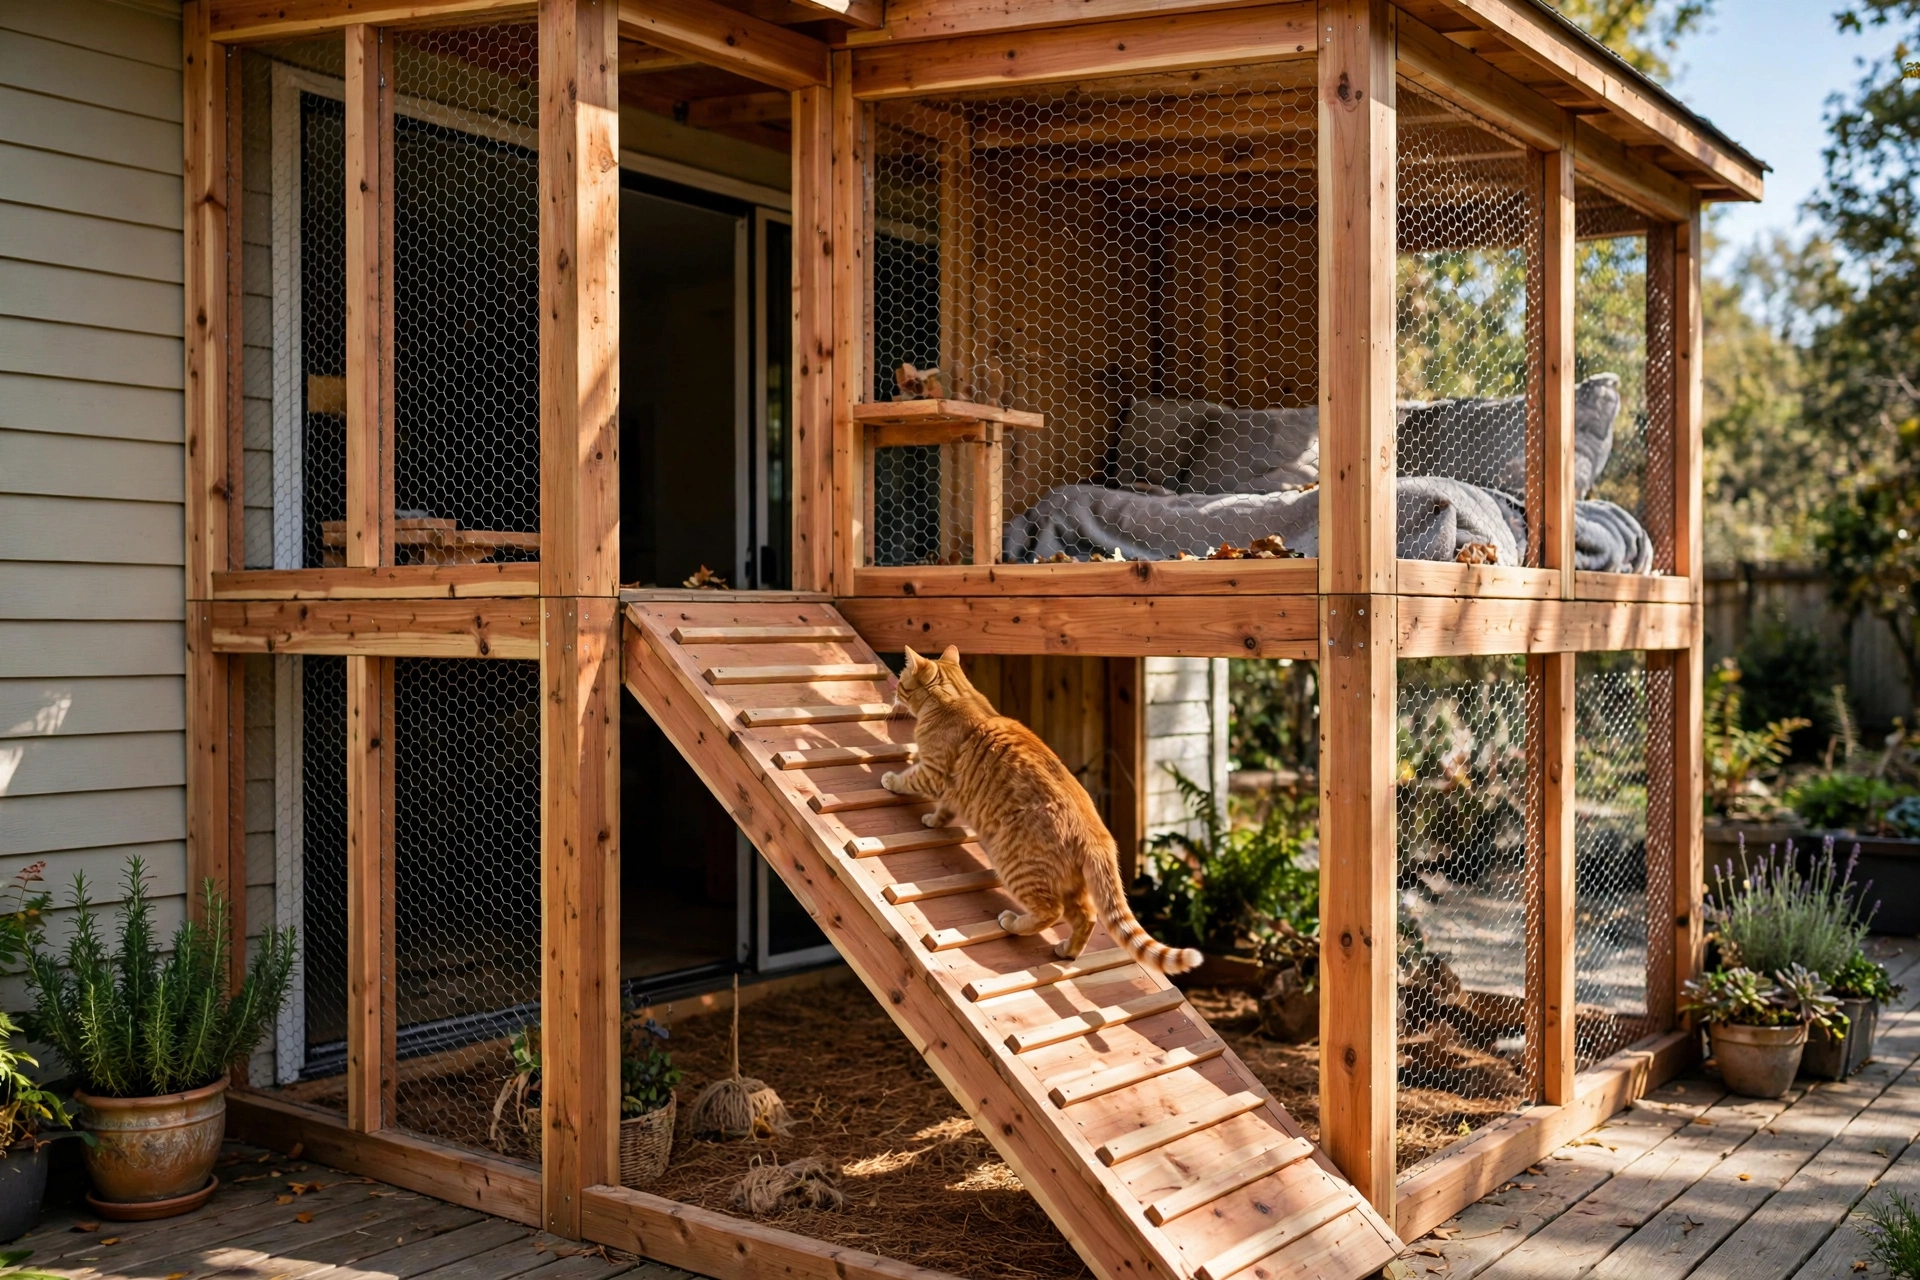
When your deck is small, build up. This two-story wooden catio uses vertical space for climbing, with an interior ramp so your cat moves between levels herself. The open lower shelf doubles as storage.
What You’ll Need: 2×4 lumber, OSB board for floor panels, chicken wire (1-inch hex), staple gun, wood screws, saw, drill, sandpaper.
How to Build It:
- Cut four vertical posts about 60 inches tall, build two rectangular frames, and sand every cut edge.
- Attach the OSB floor panels to both levels, then cut a diagonal brace at roughly 45 degrees for the ramp and staple chicken wire across it for grip.
- Wrap all sides and the top of the upper enclosure in chicken wire, stapling every 2 inches, then anchor the structure with L-brackets.
Time & Skill: About 6–8 hours. Intermediate — basic carpentry with a saw and drill.
Helpful pick: LSK Heavy Duty L Brackets — sturdy L-brackets for anchoring a tall catio to your house or deck.
4. Window-Connected Two-Story Catio
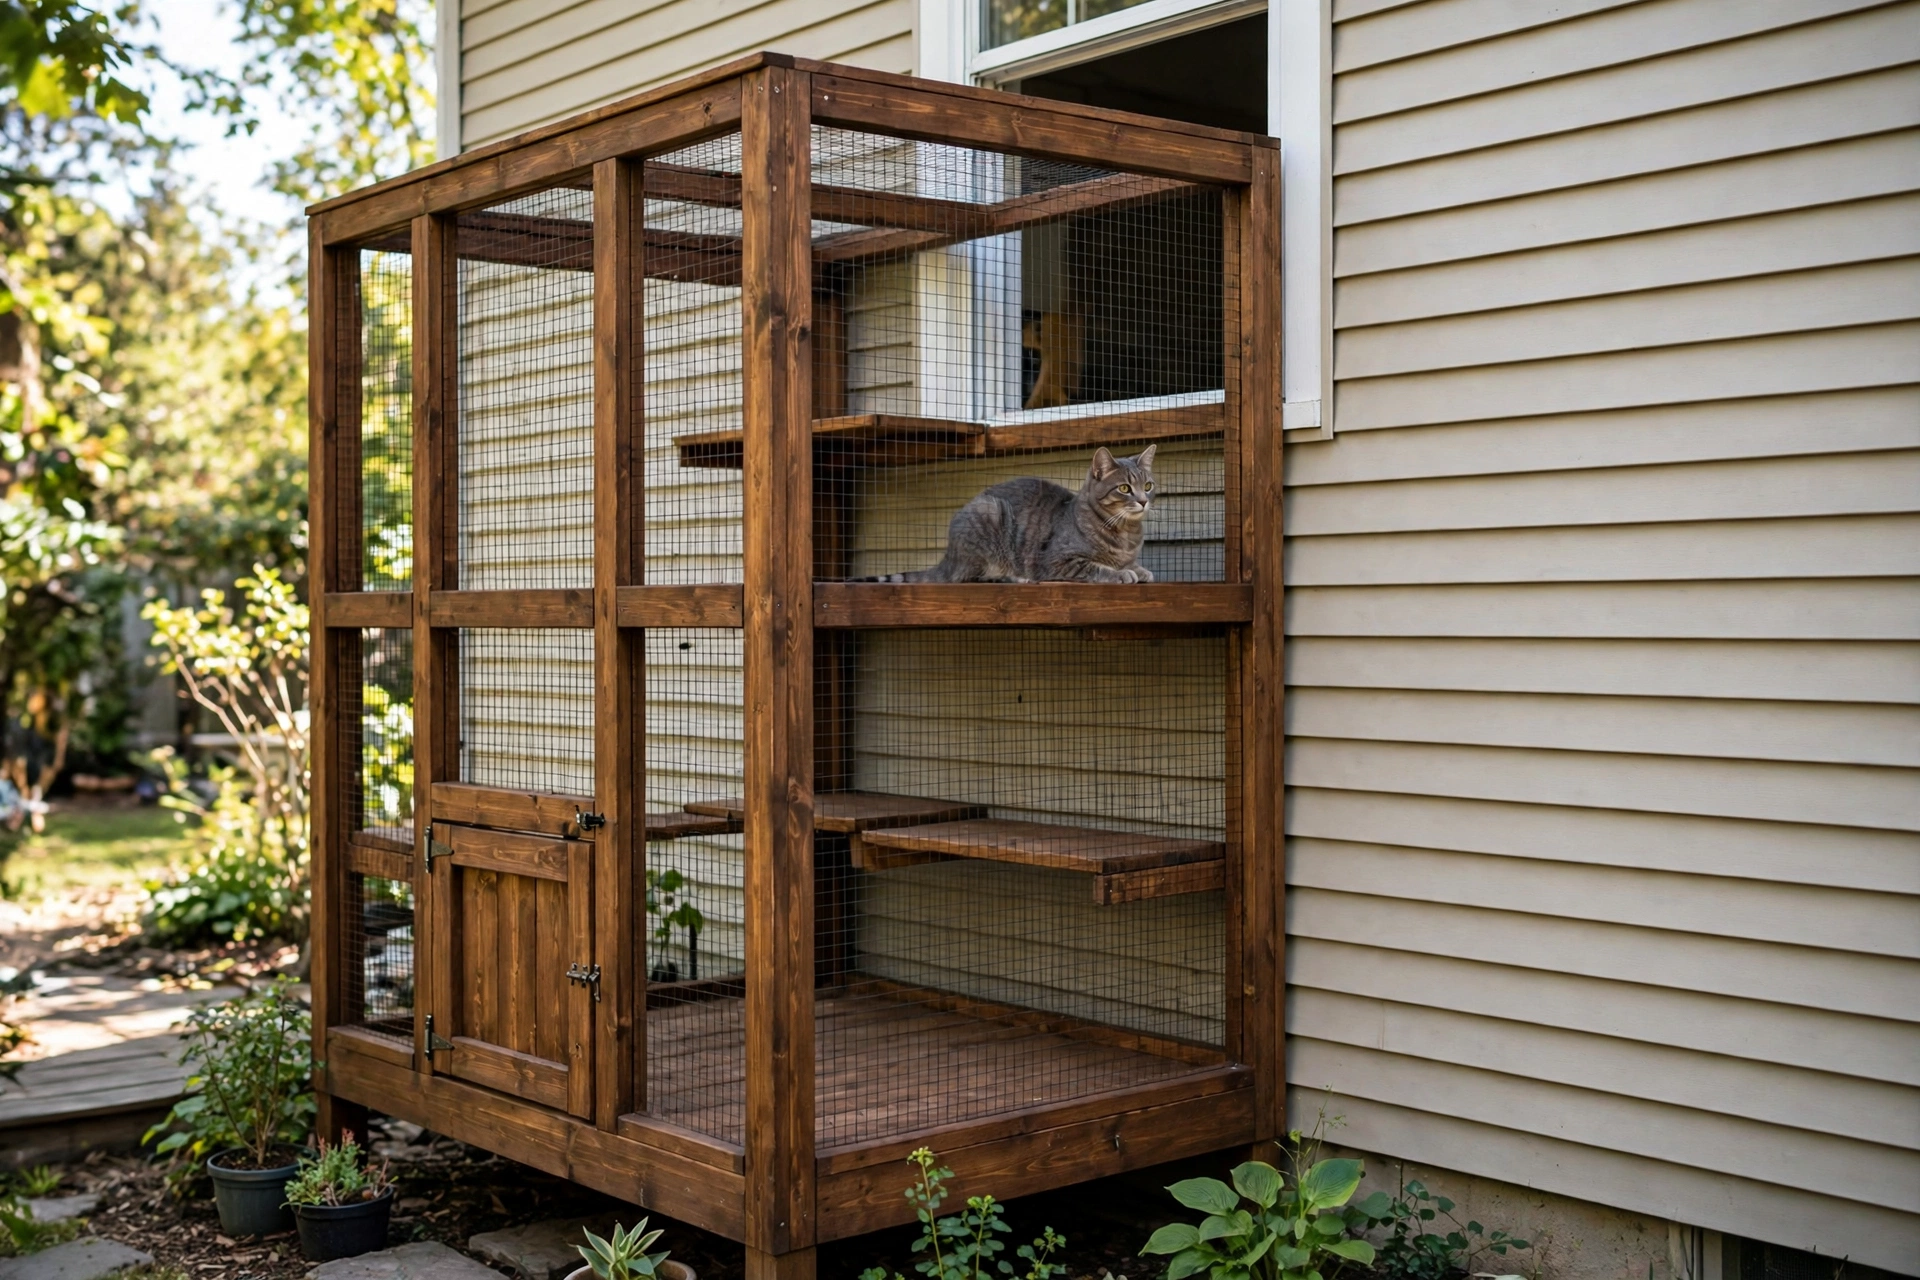
This build sits against a window or side door, so your cat walks straight from the house into her outdoor patio. Staggered shelves give her climbing room, and a hinged door lets you reach in for cleaning.
What You’ll Need: pressure-treated 2×4 lumber, hexagonal chicken wire, heavy-duty staple gun, gate hinges, barrel bolt latch and wood stain.
How to Build It:
- Measure your window height, cut posts and crossbars for two full stories of framing, and stain every piece before assembly.
- Anchor the base frame with concrete screws, stretch chicken wire across each panel, and staple it tight every 3 inches.
- Frame a door panel, hang it on hinges, and add the barrel bolt latch. Cut a window opening or leave the window cracked, and mount shelves at staggered heights inside.
Time & Skill: A full weekend. Intermediate to advanced — the two-story frame needs careful measuring.
Helpful pick: EASY JOY Cat Door — a simple pet door for creating a cat-sized passage between your house and the patio.
5. Dual-Section Catio With Staggered Shelves
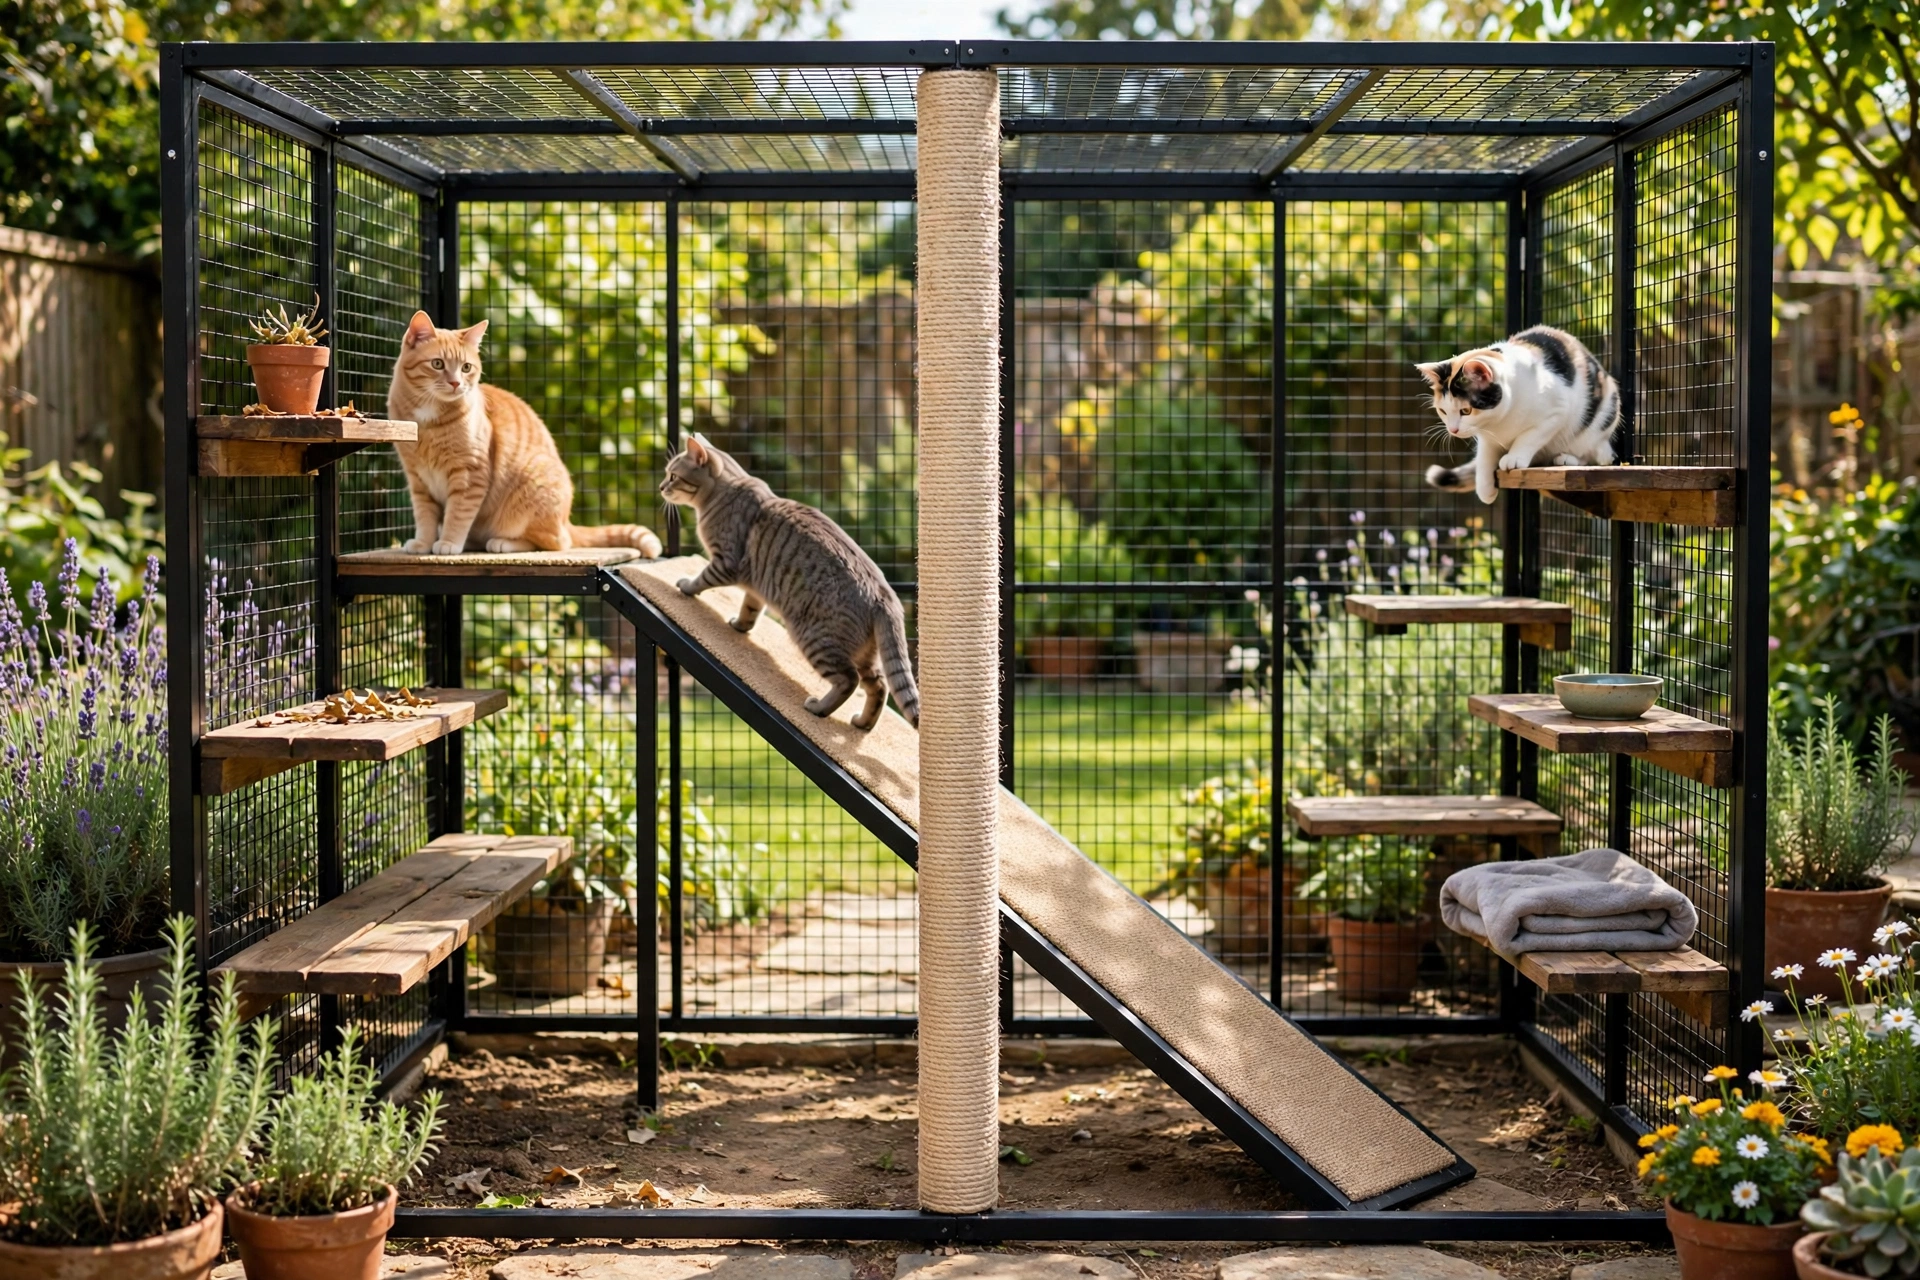
Two sections joined by a central stair ramp turn a catio into a genuine playground. Staggered shelves let even older cats reach the top levels, and a center door gives you cleaning access.
What You’ll Need: 2×4 pine lumber, black welded wire mesh (1/2-inch grid), black-painted wood framing, corrugated roofing panels, center door with hinges and latch, adjustable deck feet, sisal rope, small hanging bowls and drill.
How to Build It:
- Set the frame on adjustable deck feet so it sits level, then build the rectangular outer frame for both sections and add the corrugated roof.
- Run welded wire mesh across all sides and mount pine shelves at staggered heights, roughly 12 inches apart.
- Install the angled stair ramp, hang the hammock-style bowls, and mount the center door with its latch.
Time & Skill: Two weekends. Intermediate — the dual-frame layout takes patience.
Helpful pick: UV-Resistant Zip Ties — weatherproof zip ties for securing mesh to every frame edge.
6. Renter-Friendly Balcony Screen Patio

Screen in an apartment balcony with removable mesh panels — no drilling, no landlord approval. When you move, the whole thing comes down in an hour.
What You’ll Need: tension rods or removable frame poles, fine pet-proof screen mesh, heavy-duty zip ties, a cushion or small outdoor pet bed, potted cat grass.
How to Build It:
- Fit tension rods or poles across the balcony opening to create a frame that does not touch the building.
- Cut the screen mesh to cover the open sides and the top, zip-tying it every few inches and checking for gaps at the corners.
- Add a cushion, a water bowl, and a pot of cat grass, then let your cat explore supervised first.
Time & Skill: One afternoon. Beginner — no tools beyond scissors and zip ties.
Helpful pick: PETMAKER Pop-Up Pet Playpen — a portable mesh playpen that works as a mini patio when a permanent build is not allowed.
7. Corner Deck Catio With Wall Cat Flap
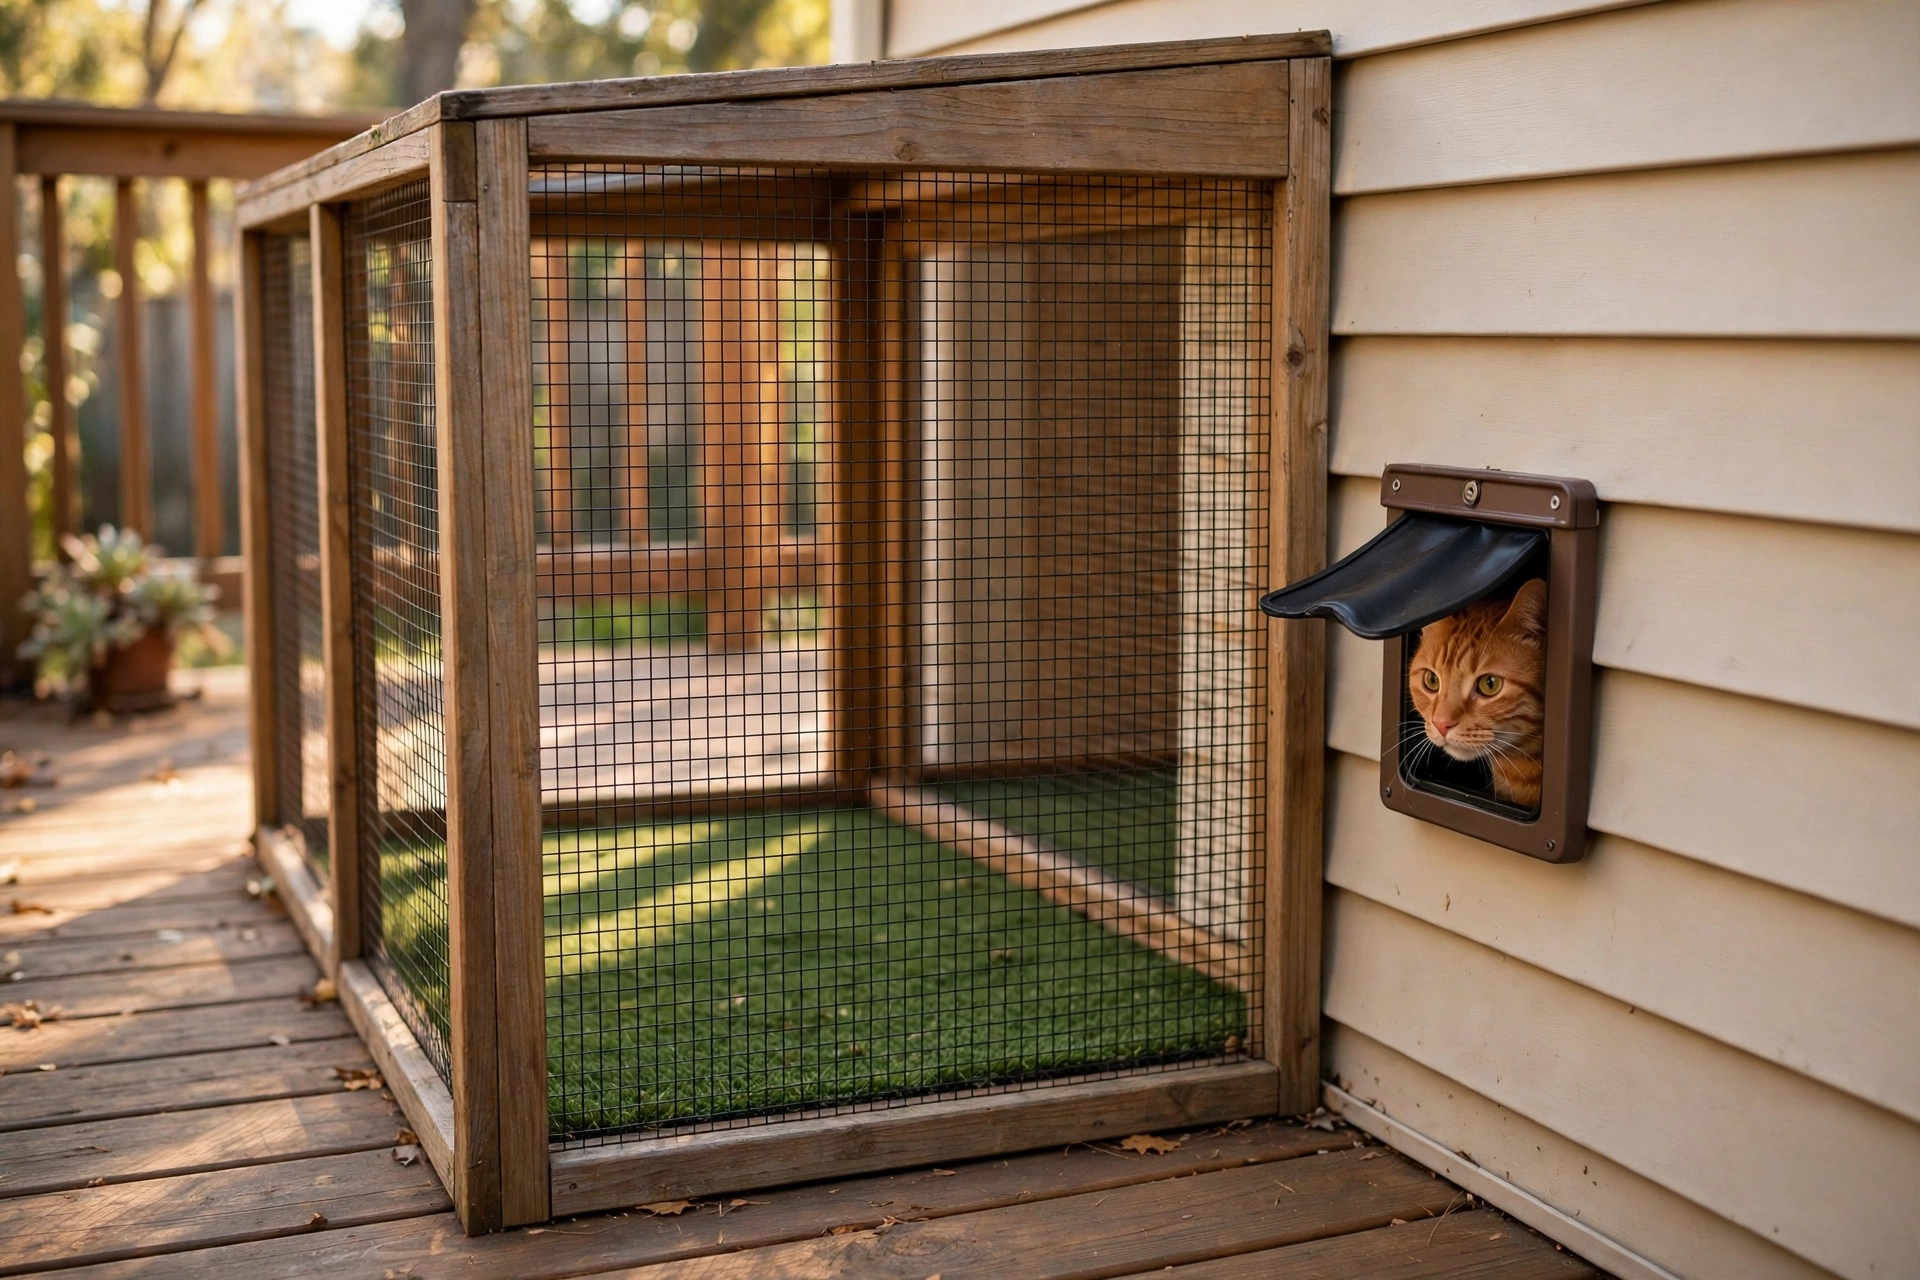
Tuck a compact enclosure into a deck corner and connect it to the house through a small cat flap. The corner placement keeps most of your deck free, and a turf mat inside hoses down easily.
What You’ll Need: 2×4 lumber, welded wire mesh, turf mat or artificial grass rug, small pet flap door, L-brackets, screws, and a drill.
How to Build It:
- Frame three walls against your house corner, sized to fit the available deck space.
- Cut a cat-sized opening in the house wall and install the pet flap door, then stretch wire mesh across the walls and top.
- Anchor the frame with L-brackets, lay the turf mat inside, and seal the flap edges against drafts.
Time & Skill: One weekend. Intermediate — cutting the wall opening takes care.
Helpful pick: Petgrow Artificial Grass Rug — an easy-clean turf floor for a small deck-corner enclosure.
Keep Reading
- 7 DIY Outdoor Cat Enclosures That Keep Cats Safe
- 12 Clever Cat Cage Ideas Your Feline Will Actually Love
- 14 Cat Apartment Ideas to Transform Your Small Space
- 16 DIY Cat Wall Ideas to Pamper Your Pet
- 14 DIY Cat Stuff Ideas Your Kitty Will Love
Frequently Asked Questions
How much does a DIY cat patio cost to build?
A balcony screen setup runs under $100, while a full wooden catio typically costs $200–$500 in materials.
Is it safe for cats to spend the whole day in a catio?
Yes, as long as they have shade, fresh water, and a way back inside. Bring them in during peak afternoon heat.
Do I need a permit to build a cat patio?
Small freestanding enclosures usually need no permit, but check local ordinances and HOA rules before building anything attached to your house.
What mesh is safe for a cat patio?
Welded wire with 1-inch or smaller openings works for most cats. Use 1/2-inch grid for very small kittens.
How do I get my cat to actually use the catio?
Place familiar bedding and treats inside and leave the access open so she can explore at her own pace.
As an Amazon Associate, PetPostHub earns from qualifying purchases.