
7 DIY Cat Enclosure Ideas That Keep Cats Safe Outdoors
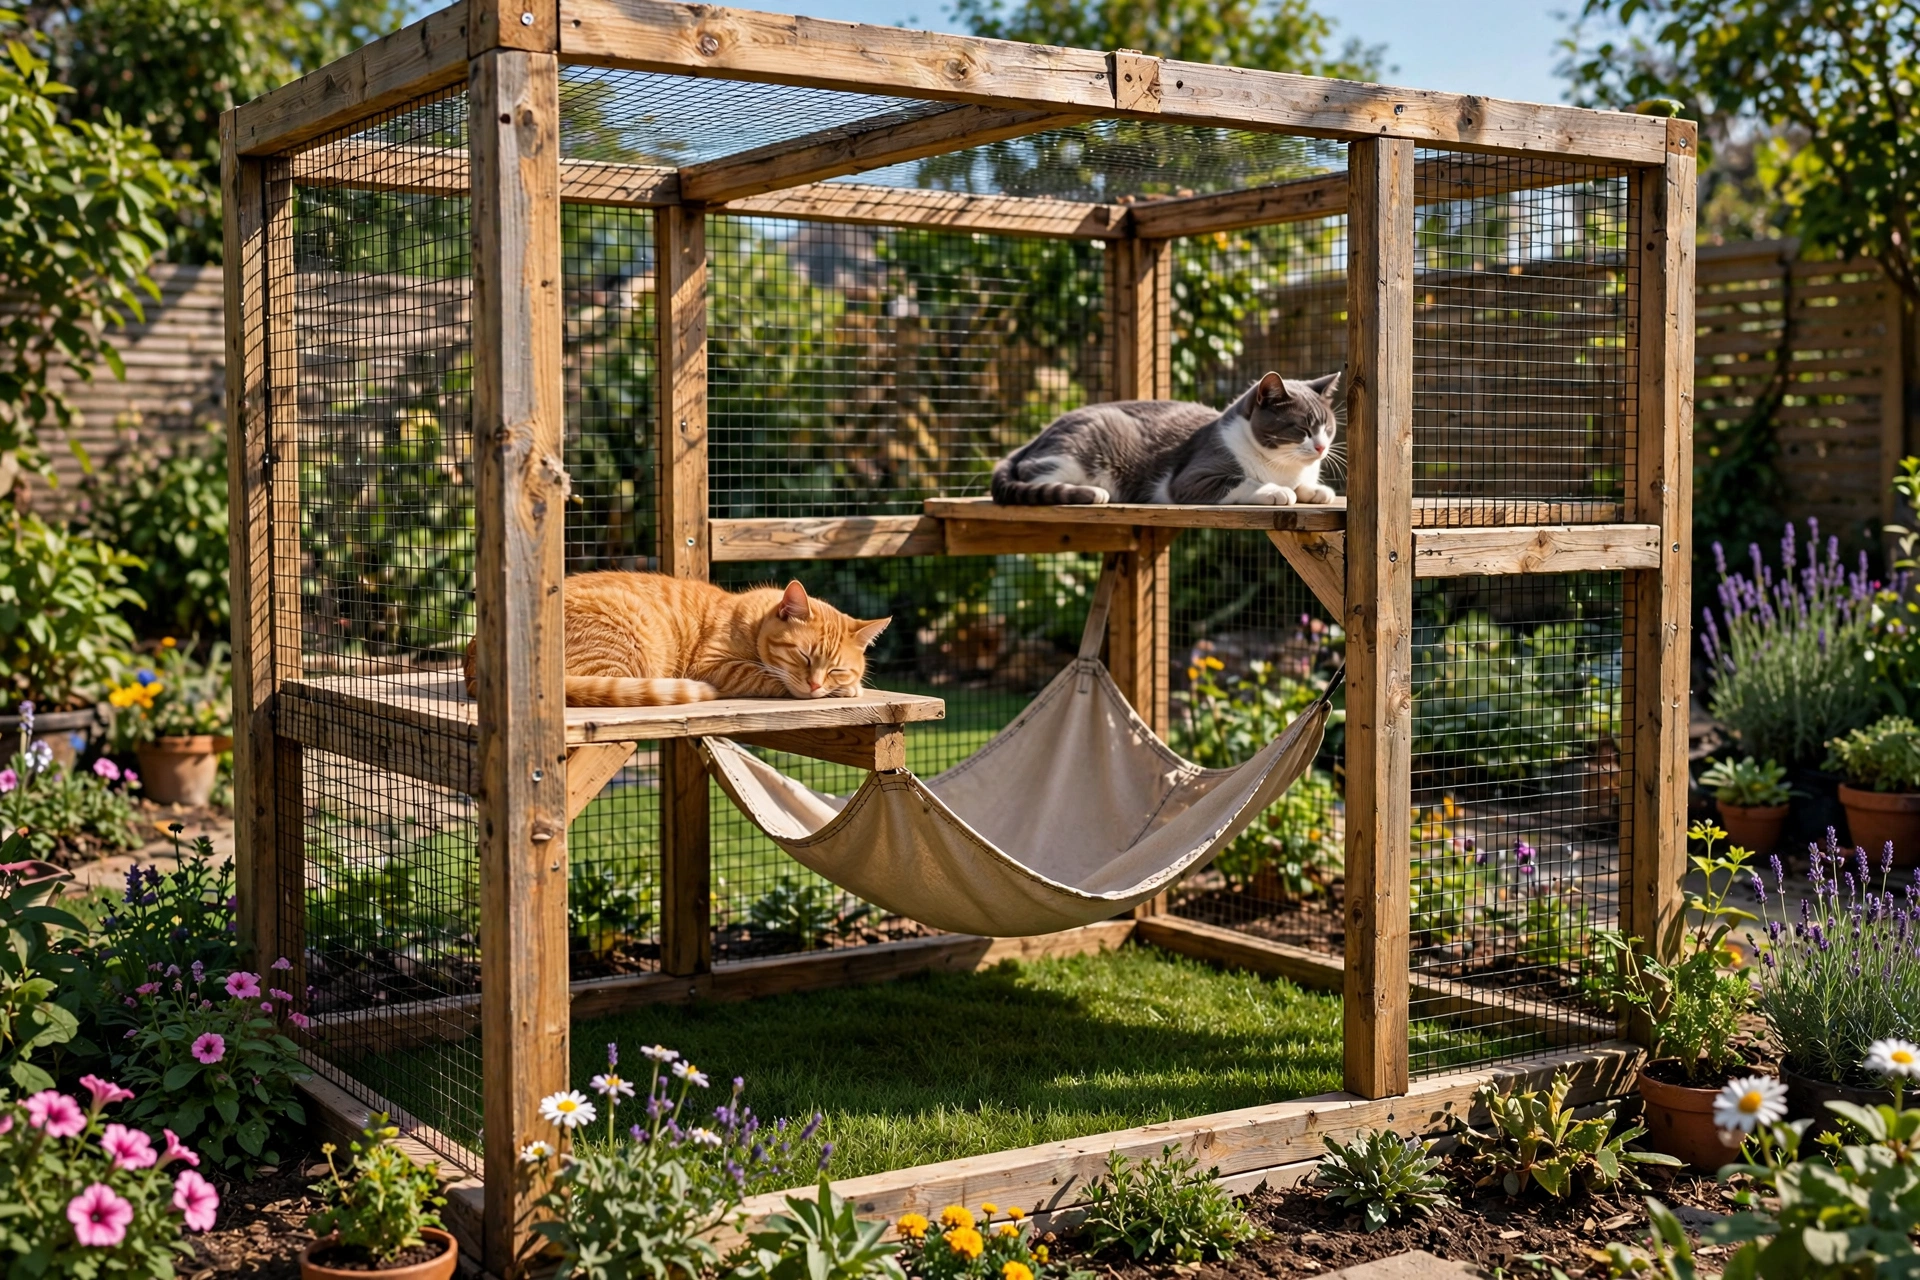
A DIY cat enclosure gives her fresh air, bird-watching, and real exercise inside a space you built yourself. These seven builds range from a one-hour balcony project to a full weekend cedar catio, each written so you can follow it with tools you already own.
Table of Contents
- 1. Timber-Frame Backyard Catio With Hammock and Plant Shelves
- 2. Window-Box Catio With a Mesh Tunnel
- 3. Renter-Friendly Balcony Enclosure
- 4. A-Frame Garden Catio
- 5. Walk-In Cedar Catio With House Access
- 6. Portable Pop-Up Playpen With Travel Tunnel
- 7. Under-Deck Catio Conversion
- Frequently Asked Questions
1. Timber-Frame Backyard Catio With Hammock and Plant Shelves

This classic weekend build uses four timber posts, wire mesh walls, and a sloped mesh roof. String a hammock between two posts, mount two staggered carpeted shelves, and add wheatgrass planters. Lay turf over the floor to keep mud out.
Materials: four 4×4 posts, 2×4 lumber for the top frame, 1/2-inch welded wire mesh, turf roll, fabric hammock, two wall shelves, exterior screws, zip ties, drill, staple gun.
Steps: Set the posts in concrete in a 6 by 8 foot rectangle and let them cure overnight. Connect with 2×4 rails, staple the mesh tight, and add a sloped roof panel. Mount the hammock, shelves, and turf, then finish with a latched mesh door.
Time: One weekend, intermediate. Two people make the frame assembly much easier.
Helpful pick: Heavy-Duty UV-Resistant Zip Ties (100-Pack) — these hold mesh panels tight to the frame without dozens of extra screws.
2. Window-Box Catio With a Mesh Tunnel

This box projects about two feet from a window and connects through the open sash, so your cat steps into fresh air anytime. Build it from 1×2 pine with wire mesh on all five outer faces, then attach a short collapsible tunnel to the window frame. A carpeted plywood floor makes a comfortable perch.
Materials: 1×2 pine boards, 1/2-inch welded wire mesh, plywood base, outdoor carpet, collapsible mesh tunnel, L-brackets, wood screws, drill, saw.
Steps: Build the box to fit your window opening and mesh all five sides, stapling every three inches. Screw in the carpeted base, mount the box to the window frame with L-brackets, and seal gaps with weather stripping. Connect the tunnel at both ends with zip ties.
Time: One afternoon, beginner to intermediate.
Helpful pick: AMOSIJOY Cordless Cat Window Perch — a sturdy sunbathing spot at the window end of the tunnel that supports up to 30 pounds.
3. Renter-Friendly Balcony Enclosure

Balconies are danger zones without a barrier, but this design damages nothing. A roll of transparent safety netting wraps the railing and stretches overhead like a canopy, held with removable cable ties and tension rods. The nearly invisible mesh keeps your view while your cat gets a safe lounge. Add a cushion and a cat grass tray along the back wall.
Materials: transparent pet safety netting, UV-resistant zip ties, two tension rods, scissors, measuring tape.
Steps: Measure every railing section and cut the netting two inches longer on each side. Attach it from the floor to the top bar with zip ties every six inches. Stretch an overhead panel between two tension rods to close the top completely. Never skip this part, because cats jump higher than you expect.
Time: Two to three hours, beginner. Fully removable when you move out.
Helpful pick: PAWISE Cat Safety Net for Balcony — a cut-to-fit UV-resistant mesh with installation hardware included.
4. A-Frame Garden Catio

An A-frame sheds rain on its own and looks charming in a flower bed. Two leaning 2×2 panels meet at a ridge, with wire mesh on both slopes and a plywood back wall. Inside, two short shelves give climbing levels, and the floor fits a small insulated hideaway. The narrow footprint suits smaller gardens.
Materials: 2×2 lumber, plywood panel, 1/2-inch welded wire mesh, two small wooden shelves, outdoor screws, hinges and latch, drill, saw.
Steps: Build two identical triangular frames and join them at the ridge. Fix the plywood back wall, mesh both slopes and the front, then cut a door opening and mount a small latched door. Screw the shelves to the frames at staggered heights and set the hideaway on the floor.
Time: One day, intermediate.
Helpful pick: GeerDuo Outdoor Cat House — a weatherproof insulated hideaway that fits perfectly inside the A-frame floor.
5. Walk-In Cedar Catio With House Access

This flagship build attaches to your house wall so cats come and go through their own entry. Cedar posts and welded wire walls stay sturdy for years, while a sloped metal roof handles heavy rain. Staggered shelves at three heights create a perch hierarchy cats genuinely use. Fit a pet door into the wall with a short framed tunnel.
Materials: cedar 4×4 posts, cedar 2×4 lumber, 1/2-inch welded wire mesh, corrugated metal roofing, pet door flap, hinges and barrel bolt, exterior screws, drill, saw.
Steps: Set the posts against the house wall and frame walls with 2×4 cross members. Staple the mesh to each panel and build the door with a dual-lock latch. Mount shelves at 18, 36, and 54 inches, sanding edges smooth. Install the pitched metal roof, fit the pet door, stain, and cure 48 hours.
Time: Two to three days, intermediate to advanced.
Helpful pick: EASY JOY 4-Way Locking Cat Door — gives your cat her own keyless entry between the house and the enclosure.
6. Portable Pop-Up Playpen With Travel Tunnel

For camping trips or visits to a friend’s yard, this folding setup gives your cat a safe bubble anywhere. A pop-up mesh tent springs open in seconds, and a collapsible tunnel zips onto its side flap so your cat can wander between the tent and your car. Stake the corners and add a fleece mat. Everything folds flat into a carry bag.
Materials: pop-up mesh tent with spring frame, collapsible fabric tunnel, four ground stakes, fleece mat, bungee cords.
Steps: Pop the tent open on flat grass and stake all four corners. Zip the tunnel onto the side flap and stake its middle ring so it stays straight. Run the far end toward your vehicle and secure it with a bungee cord. Drop in the mat, a water dish, and one toy.
Time: Fifteen minutes, beginner. The easiest build here.
Helpful pick: PETMAKER Pop-Up Pet Playpen — a fold-flat tent with mesh sides and removable roof, complete with carrying bag.
7. Under-Deck Catio Conversion

The space under a raised deck is waiting to become a catio. Enclose the perimeter with wire mesh attached to the deck posts, add lattice trim to hide the edges, and you have a shaded, weather-protected enclosure. A turf floor keeps paws clean, a sisal post gives claws a target, and the deck above provides rain cover.
Materials: 1/2-inch welded wire mesh panels, lattice trim boards, artificial turf, sisal scratching post, small cat house, exterior screws, drill, staple gun.
Steps: Measure the gaps between deck posts and cut mesh panels to fit. Screw the panels to the posts and cover seams with lattice trim. Lay the turf tight around the post bases. Add the scratching post and cat house, then install a mesh door panel on the side you use most.
Time: One day, beginner to intermediate.
Helpful pick: Petgrow Artificial Grass Rug — a cut-to-fit turf with drainage backing that turns bare ground into a soft lawn.
Keep Reading
- 12 Stylish Cat Box Ideas for Your Home (2026)
- 14 Cat Food Bowl Ideas Your Kitty Will Adore (2026)
- 12 Clever Cat Cage Ideas Your Feline Will Love (2026)
- 16 Cat Enrichment Ideas to Boost Kitty Happiness (2026)
- 6 Clever Cat Corner Ideas Your Feline Will Adore (2026)
Frequently Asked Questions
How much does a DIY cat enclosure cost?
A balcony net or pop-up setup can cost under $60. A timber backyard catio usually runs $150 to $400, while a full walk-in cedar build can reach $600 to $900. Professionally installed catios often start above $2,000.
What wire mesh is safe for a cat enclosure?
Use 1/2-inch welded wire mesh or heavy-duty vinyl-coated wire, 14-gauge or thicker. Avoid chicken wire, because cats can bend it and predators can tear through it. Fasten it every few inches so there are no loose edges.
Can cats stay in an outdoor enclosure in winter?
Yes, with shelter from wind and wet weather. Add an insulated hideaway box and a dry cushion, and cover at least part of the enclosure. In freezing climates, keep sessions shorter and always let your cat choose to come back inside.
Do I need a permit to build a catio?
Most small, freestanding catios do not need a permit, but rules vary by city and HOA. Anything attached to your house or close to a property line is worth checking with your local building office first.
How do I get my cat used to the enclosure?
Start with short supervised visits, treats, and a favorite blanket inside. Most cats explore on their own within a day or two. Keep first sessions to 15 to 20 minutes.
As an Amazon Associate, PetPostHub earns from qualifying purchases.




14 Comments