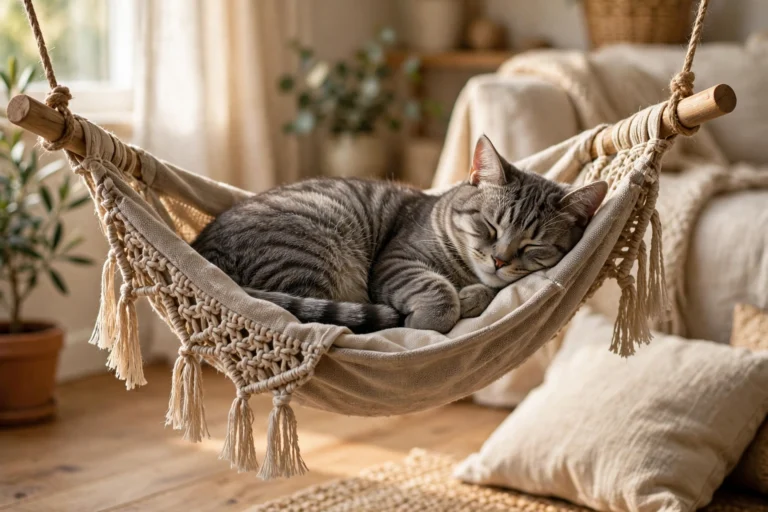
7 DIY Cat Tower Ideas Your Cat Will Actually Use

Does your cat treat your curtains like a climbing wall and your sofa like a scratching post? A great cat tower DIY project can fix all of that in a single weekend. Cats are vertical animals — they feel safest surveying their territory from up high — and a homemade tower gives them exactly that outlet while saving your furniture. Below are 7 original DIY cat tower builds, from a zero-cost cardboard fortress to a reclaimed pallet lookout. Each includes materials, build steps, and a realistic time estimate.
Table of Contents
- 1. Reclaimed Pallet Lookout Tower
- 2. Cardboard Box Fortress Tower
- 3. Stacked Vintage Suitcase Tower
- 4. Leaning Ladder Climbing Tower
- 5. PVC Pipe Modular Play Tower
- 6. Natural Driftwood & Log Tower
- 7. Bookshelf Conversion Tower
- Frequently Asked Questions
1. Reclaimed Pallet Lookout Tower

Shipping pallets are pre-cut lumber waiting for a second life, and they make a wonderfully sturdy cat tower. The slats give cats plenty of toe-holds, and the build costs almost nothing with free pallets from a warehouse or garden center.
Materials: 2–3 heat-treated wooden pallets (look for the HT stamp), 4 short 4×4 posts for spacers, wood screws, sandpaper, sisal rope, wood stain.
How to build it: Sand every pallet smooth to remove splinters, stack them with a post at each corner between layers, and drive screws through everything. Wrap the corner posts with sisal rope for scratching surfaces, finish with pet-safe wood stain, and let it cure 24 hours before your cat explores.
Project time: 4–5 hours | Difficulty: Intermediate | Cost: Under $30
Helpful pick: TienYow Natural Sisal Rope — wrap the support posts for a scratch zone your cat will actually prefer over the sofa arm.
2. Cardboard Box Fortress Tower

The fanciest tower in the world loses to an empty box every time. Cut round doorways into sturdy shipping boxes and stack them into a multi-room fortress. It’s free, customizable, and recyclable when it wears out.
Materials: 5–7 sturdy cardboard boxes (double-wall works best), a sharp box cutter, hot glue gun, packing tape, non-toxic paint or fabric scraps.
How to build it: Arrange boxes from largest at the bottom to smallest at the top. Trace a 6–8 inch circle on each box where doorways should line up between levels, then cut them out. Stack and glue the boxes, reinforcing seams with packing tape on the inside. Keep the heaviest box on the bottom so the tower can’t tip.
Project time: 2–3 hours | Difficulty: Beginner | Cost: Free
Helpful pick: OUTXE Cardboard Cutter — clean, safe cuts through double-wall cardboard for doorways and peepholes.
3. Stacked Vintage Suitcase Tower

Old hard-shell suitcases from thrift stores make a cat tower that doubles as decor. Flat, stable, and stackable, they bring a charming travel theme to any room. Add a cushion inside each case and stack them offset so your cat can hop between levels.
Materials: 3–4 vintage hard-shell suitcases in graduating sizes, L-brackets and screws, small cushions or folded blankets, a wide wooden base board.
How to build it: Clean and air out the suitcases first. Place the largest on the base board and screw L-brackets through the bottom into the board. Open each lid flat or remove it for open perches. Stack the next case at a slight angle, securing with brackets. Lay a cushion in every open case and press down firmly to check each level holds your cat’s weight.
Project time: 2–3 hours | Difficulty: Beginner | Cost: $20–$40
Helpful pick: LSK Heavy Duty L Brackets — hidden brackets that keep the stacked cases rock solid without ruining the vintage look.
4. Leaning Ladder Climbing Tower

A wooden step ladder leaned against the wall is already halfway to a cat tower — the rungs are natural climbing steps. Add carpeted platforms between them for a climbing gym with almost no footprint, and no wall drilling for renters.
Materials: an old wooden step ladder, carpet squares or rug remnants, wooden dowels, screws, sandpaper, anti-slip pads for the feet.
How to build it: Sand the ladder and check every rung for cracks or looseness. Cut small platform boards to fit between rungs, screw them in from the sides, and cover each with a carpet square stapled tight underneath. Add a dowel across the top rungs as a toy bar. Lean the ladder at roughly 75 degrees with anti-slip pads under the feet, and anchor the top rung to the wall with a removable hook if your cat is an ambitious jumper.
Project time: 3–4 hours | Difficulty: Beginner-Intermediate | Cost: Under $25
Helpful pick: ONUPGO Hardwood Dowels — sturdy rods for toy bars and extra rung supports on your ladder tower.
5. PVC Pipe Modular Play Tower

PVC pipe is the secret weapon of DIY pet furniture: cheap, light, strong, and it snaps together like building blocks. Build a modular frame with fabric hammocks slung between levels — the joints come apart and snap back together whenever you want a new layout.
Materials: 1-inch PVC pipe (about 40 feet), elbow and T-joints, PVC cement, sturdy canvas for hammocks, zip ties, a rubber mallet.
How to build it: Sketch your frame on paper first — two tall sides connected by crossbars at three heights is a solid design. Dry-fit everything before gluing, then cement the joints one at a time. Hem the hammock fabric, secure each corner to the frame with tight zip ties, and let the cement cure two hours before the first test climb.
Project time: 3–4 hours | Difficulty: Beginner | Cost: $30–$50
Helpful pick: TianTianUp PVC Fittings Kit — elbows, tees, and crosses that make your frame design endlessly reconfigurable.
6. Natural Driftwood & Log Tower

Some cats go wild for anything that smells like the outdoors. Real logs and driftwood anchored to a heavy plywood base create a tree-like tower that looks like sculpture and plays like a jungle gym. The bark is a natural scratching surface that keeps cats curious far longer than straight posts.
Materials: 2–3 sturdy logs or thick driftwood branches (3–5 feet tall), a 2×2 foot plywood base, large bolts and washers, pet-safe wood stain or beeswax, rope for accent wrapping.
How to build it: Source dried, cured wood — green logs can crack and harbor insects. Sand off loose bark, drill through the base, and bolt each log upright with large washers underneath. Angle one branch outward for a climbing challenge, seal with stain or beeswax, and widen the base or add a counterweight if it wobbles.
Project time: 4–6 hours | Difficulty: Intermediate | Cost: $20–$40
Helpful pick: KILZ Waterproofing Wood Stain — seals natural wood against claw oils and moisture so your log tower lasts for years.
7. Bookshelf Conversion Tower

That small bookshelf you were about to donate? It’s a cat tower in disguise. The shelves are ready-made perches at perfect jumping intervals, and the enclosed frame feels den-like. A few cushions and scratching pads turn it into a multi-level playground in one afternoon.
Materials: a small wooden bookshelf or cube organizer, cushions or folded blankets, peel-and-stick carpet tiles, screws for anchoring, a staple gun.
How to build it: Keep the bookshelf upright or lay it on its side — whichever gives the best perch spacing for your cat’s jumping ability. Remove or cut out the back panel on levels you want open for climbing through. Line every shelf with a carpet tile or cushion. Stick scratching pads on the outer sides. Most importantly, anchor the top to the wall with an anti-tip strap or L-bracket — tall furniture and climbing cats are a tipping hazard.
Project time: 2–3 hours | Difficulty: Beginner | Cost: Under $30
Helpful pick: Orgthin Peel and Stick Carpet Tiles — quick-grip perch padding for every shelf, no staples or glue needed.
Keep Reading
- 7 DIY Cat Enclosure Ideas for Safe Outdoor Time
- 7 DIY Cat Patio Ideas for Safe Outdoor Time (2026)
- 16 DIY Cat Wall Ideas to Transform Your Space
- 12 Clever Cat Cage Ideas Your Feline Will Actually Love
- 7 Indoor Cat Playground DIY Ideas
Frequently Asked Questions
How tall should a DIY cat tower be?
Most cats are happiest with a tower between 3 and 5 feet tall — a commanding view with safe jumps. Young kittens and senior cats do better with lower, wider towers around 2 to 3 feet with closely spaced levels.
What materials are safe for a homemade cat tower?
Untreated or heat-treated wood, natural sisal rope, cardboard, and pet-safe paints and stains are all safe. Avoid pressure-treated lumber, toxic glues, and small parts that could break off. Always let finishes cure fully before your cat uses the tower.
How do I get my cat to actually use a new tower?
Place it near a window or where your cat already hangs out. Sprinkle a little catnip on the platforms, play with a wand toy around it, and put a worn t-shirt of yours on one level so it smells familiar. Most cats investigate within a day or two.
How often should I repair a DIY cat tower?
Inspect it monthly: tighten loose screws, re-wrap frayed sisal, and replace worn fabric. Cardboard towers may need rebuilding every few months, while a well-built wooden tower lasts for years with basic maintenance.
Is it cheaper to build a cat tower than buy one?
Usually, yes — especially with reclaimed materials like pallets or an old bookshelf. Most builds above cost under $50, while a comparable store-bought tower runs $80 to $200, and yours will fit your space exactly.
As an Amazon Associate, PetPostHub earns from qualifying purchases.