
7 Cat DIY Projects Worth a Weekend Build (2026)

Cats do not ask for much: a sunny spot, something to scratch, and a hiding place that smells like them. These cat DIY projects give all three without the price tag of store-bought furniture, and most finish in a single weekend.
1. Side-Table Cat Hammock

Turn an ordinary side table into a two-in-one piece of furniture: a surface for your lamp and a cozy swinging bed for your cat. The open space beneath most side tables is wasted, and cats love suspended spots that rock gently when they settle in.
Materials: small wooden side table with a sturdy frame, cotton canvas or fleece fabric cut to about 20 by 20 inches, four 12-inch lengths of cotton rope or ribbon, drill, wood screws or strong hooks, scissors or sewing machine.
Steps: Fasten a hook or eye screw into each table leg below the tabletop. Hem the fabric square so it will not fray. Thread one rope length through each corner, knot it, and tie it to the hooks so the fabric hangs with a gentle sag in the middle. The sag is the whole point, so leave several inches of dip.
Time and difficulty: about 2 hours; beginner.
Tip: Rub a pinch of catnip into the fabric on day one. Most cats claim the hammock within 48 hours, and once they do, your throw pillows are finally safe.
Helpful pick: YourFleece Anti-Pill Fleece Fabric — a soft, washable yard of fleece makes a hammock that holds up to kneading claws.
2. Wooden Cat Tower with Sisal Scratching Posts

Store-bought cat trees are usually carpeted monsters that shed fibers and clash with everything. Building your own from pine boards and sisal rope gives your cat a scratching, climbing, and napping station that looks like real furniture.
Materials: pine boards for two uprights and three platforms, one 4-inch wooden post, natural sisal rope, felt fabric, wood screws, wood glue, sandpaper, drill and jigsaw.
Steps: Cut two uprights and three platforms, then sand every edge smooth. Build a square cubby box as the base with a circular entry hole in the front panel. Mount the uprights to the base with pilot holes and 3-inch screws, then attach the platforms. Wrap the vertical post tightly in sisal rope, gluing the starting end. Hang the felt hammock between the two top crossbars on wooden dowels threaded through sewn loops.
Time and difficulty: 6 to 8 hours; intermediate.
Tip: Wobble-test the tower before your cat finds it. A stable tower gets climbed; a wobbly one gets ignored.
Helpful pick: TienYow Natural Sisal Rope — a long coil of natural sisal wraps two to three full scratching posts with rope to spare.
3. Rope-Wrapped Sphere Cat Pod on a Cube Frame

Cats feel calmest in enclosed spaces, and this sphere pod gives them a den that reads as modern decor. The rope texture doubles as a scratch surface, and the cube frame lets you rotate the opening toward any corner.
Materials: cotton rope or chunky craft cord, a balloon or wire mesh mold, craft wire for the cube frame, fleece fabric and poly-fill, hot glue gun, wire cutters and pliers.
Steps: Wrap rope in overlapping layers over the inflated balloon, securing each pass with hot glue, until the sphere feels firm. Once dry, pop the balloon and cut a 6-inch circular opening in the front. Bend craft wire into a cube frame slightly larger than the sphere and set the pod inside. Sew a round fleece cushion, stuff it generously, and tuck it in.
Time and difficulty: 3 to 4 hours; intermediate.
Tip: Set the pod on a dresser or shelf instead of the floor. Cats nap longer when their hideout is elevated and away from foot traffic.
Helpful pick: AIFUN Natural Cotton Macrame Cord — a soft, sturdy cord that wraps evenly and takes hot glue beautifully.
4. Wall-Mounted Sisal Scratching Post with Angle Scratcher
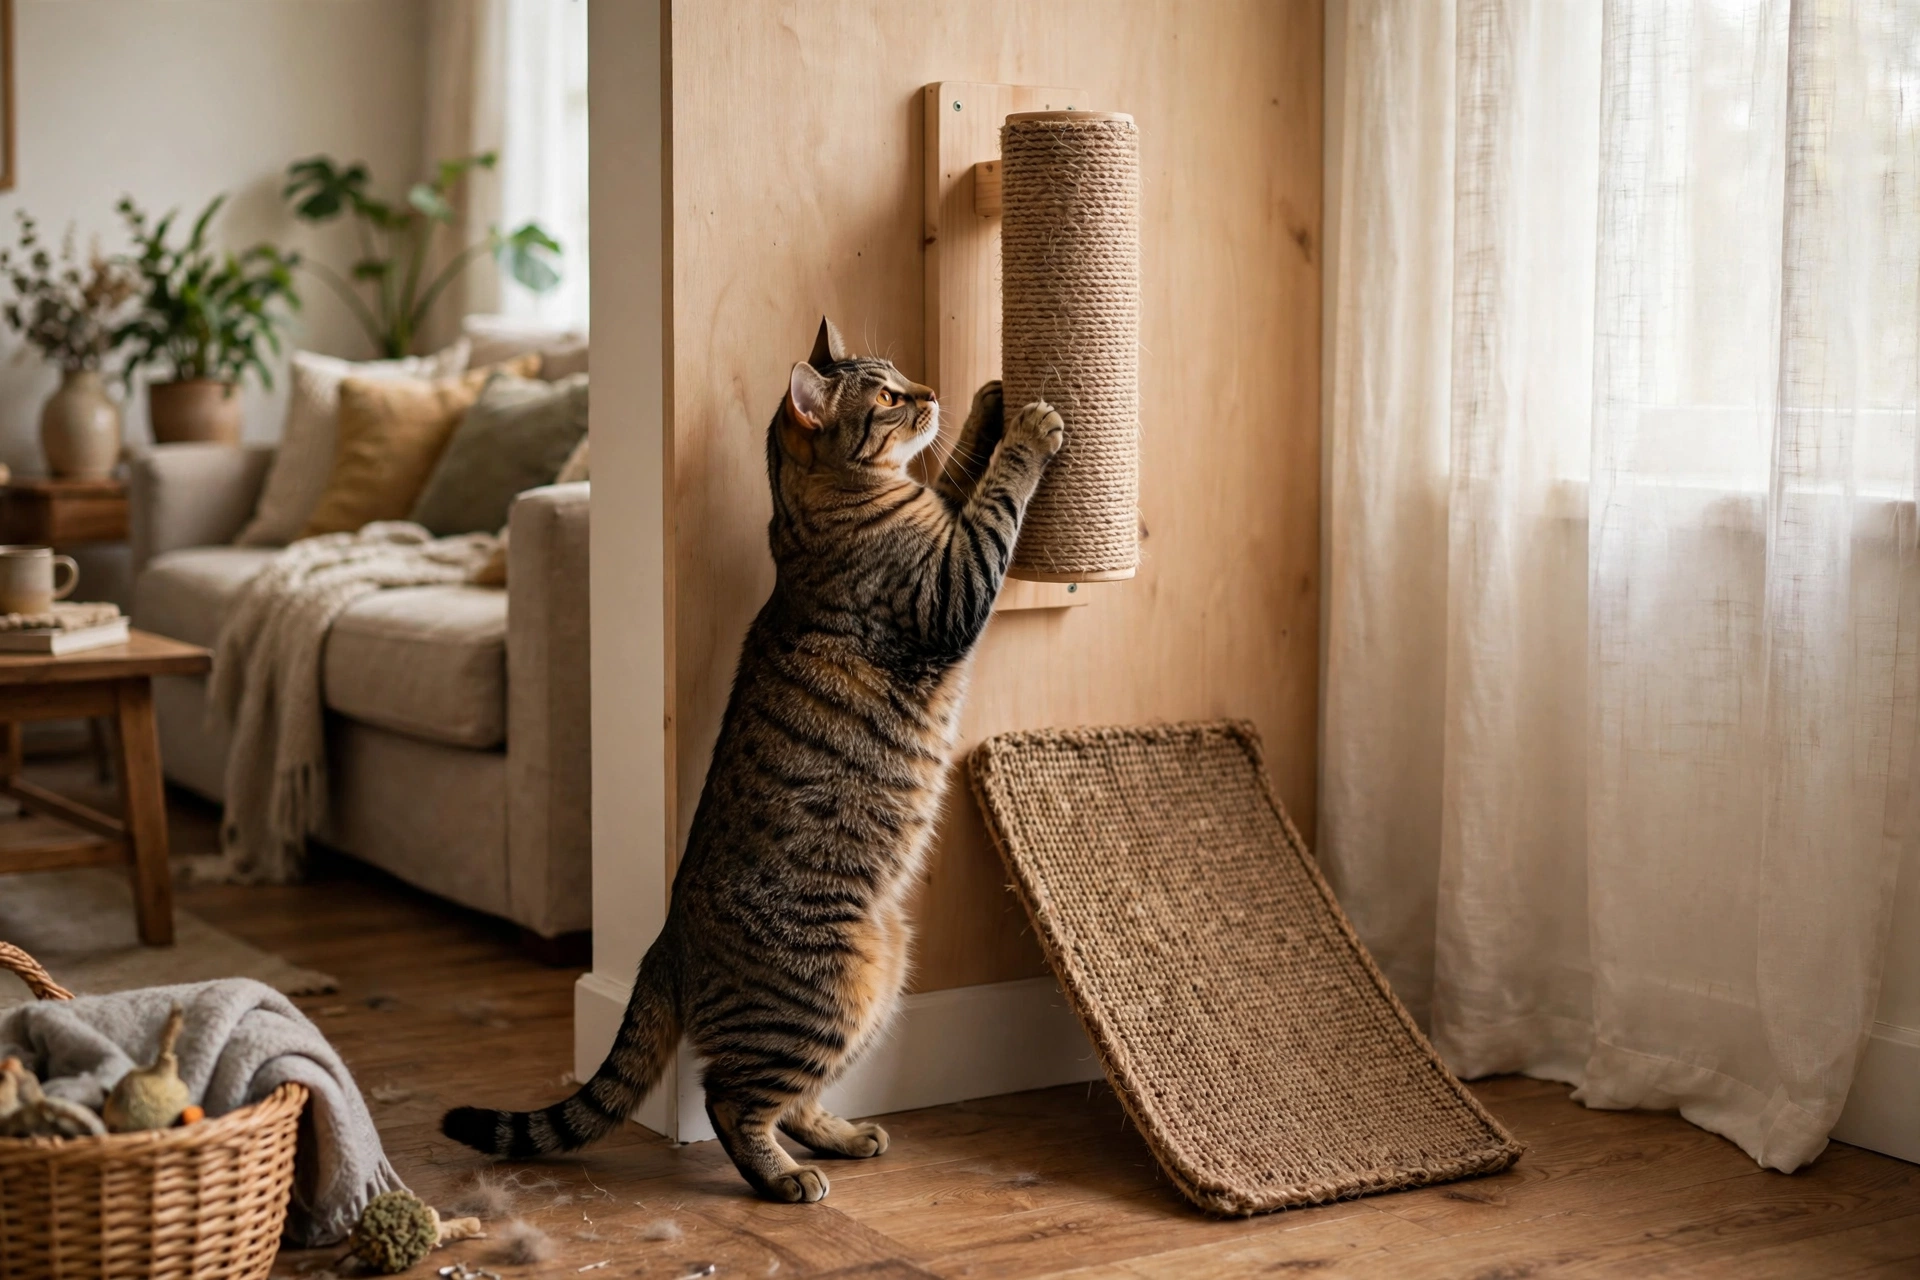
When a cat scratches the armrest, it is asking for a vertical scratch surface in exactly that spot. Mounting a post on the wall next to the furniture they already target redirects the habit in one weekend.
Steps: Wrap the post tightly in sisal rope, gluing the starting end and every few rows. Mark the wall next to the targeted furniture and mount the post with L-brackets and wall anchors, checking it is vertical with a level. Prop the sisal mat at a gentle angle against the base for cats that prefer a leaning scratch.
Time and difficulty: 2 to 3 hours; beginner to intermediate.
Tip: Scratch some dried catnip into the rope fibers. One rewarding scratch session teaches most cats this post is theirs.
Helpful pick: BUSHIBU Tape Measure — accurate measurements keep wall posts level, anchored, and rock-solid.
5. Cardboard Box Castle with Hidden Cubbies

Every cat owner knows the truth: the toy is the box it came in. This project turns that instinct into a weekend masterpiece, a stacked cardboard fortress with rooms, windows, and lookout towers that keeps cats busy for months.
Materials: four to six sturdy shipping boxes in varied sizes, box cutter or electric cardboard cutter, non-toxic craft paint or contact paper, hot glue gun, masking tape, marker for tracing arch shapes.
Steps: Trace arch shapes for doorways and windows with a bowl as a stencil, then cut them out. Glue and tape the boxes into a stacked castle with connecting tunnels between floors. Cover the outside with contact paper or non-toxic paint so it looks intentional, then let it dry and air out before your cat moves in.
Time and difficulty: 3 to 4 hours; beginner.
Tip: Keep the paint to the outside walls only. Cats chew the cut edges, and the inside should stay bare cardboard.
Helpful pick: OUTXE Electric Cardboard Cutter — clean cuts through thick corrugated boxes without sore hands.
6. Window Sill Perch Seat from Reclaimed Wood

A sunny window is the most underused square footage in your home. A simple wooden perch turns any wide sill into a cat observatory with a cushion, a view of birds, and hours of quiet entertainment for both of you.
Materials: a wood board cut to your sill depth, two brackets or shelf supports, a foam pad and removable cushion cover, screws, sandpaper, wood sealant safe for pets.
Steps: Measure your sill and cut the board to fit, sanding the edges smooth. Mount it on brackets so it extends the sill by 6 to 8 inches and holds your cat’s full weight. Seal the wood, let it cure, then top it with a washable cushion on the sunniest window in the house.
Time and difficulty: 2 hours; beginner.
Tip: A removable cushion cover matters more than the wood finish. You will wash it monthly once your cat naps there daily.
Helpful pick: AMOSIJOY Cordless Cat Window Perch — a no-tools perch that works in rentals where drilling into the wall is off the table.
7. No-Sew Fleece Blanket and Catnip Toy Set
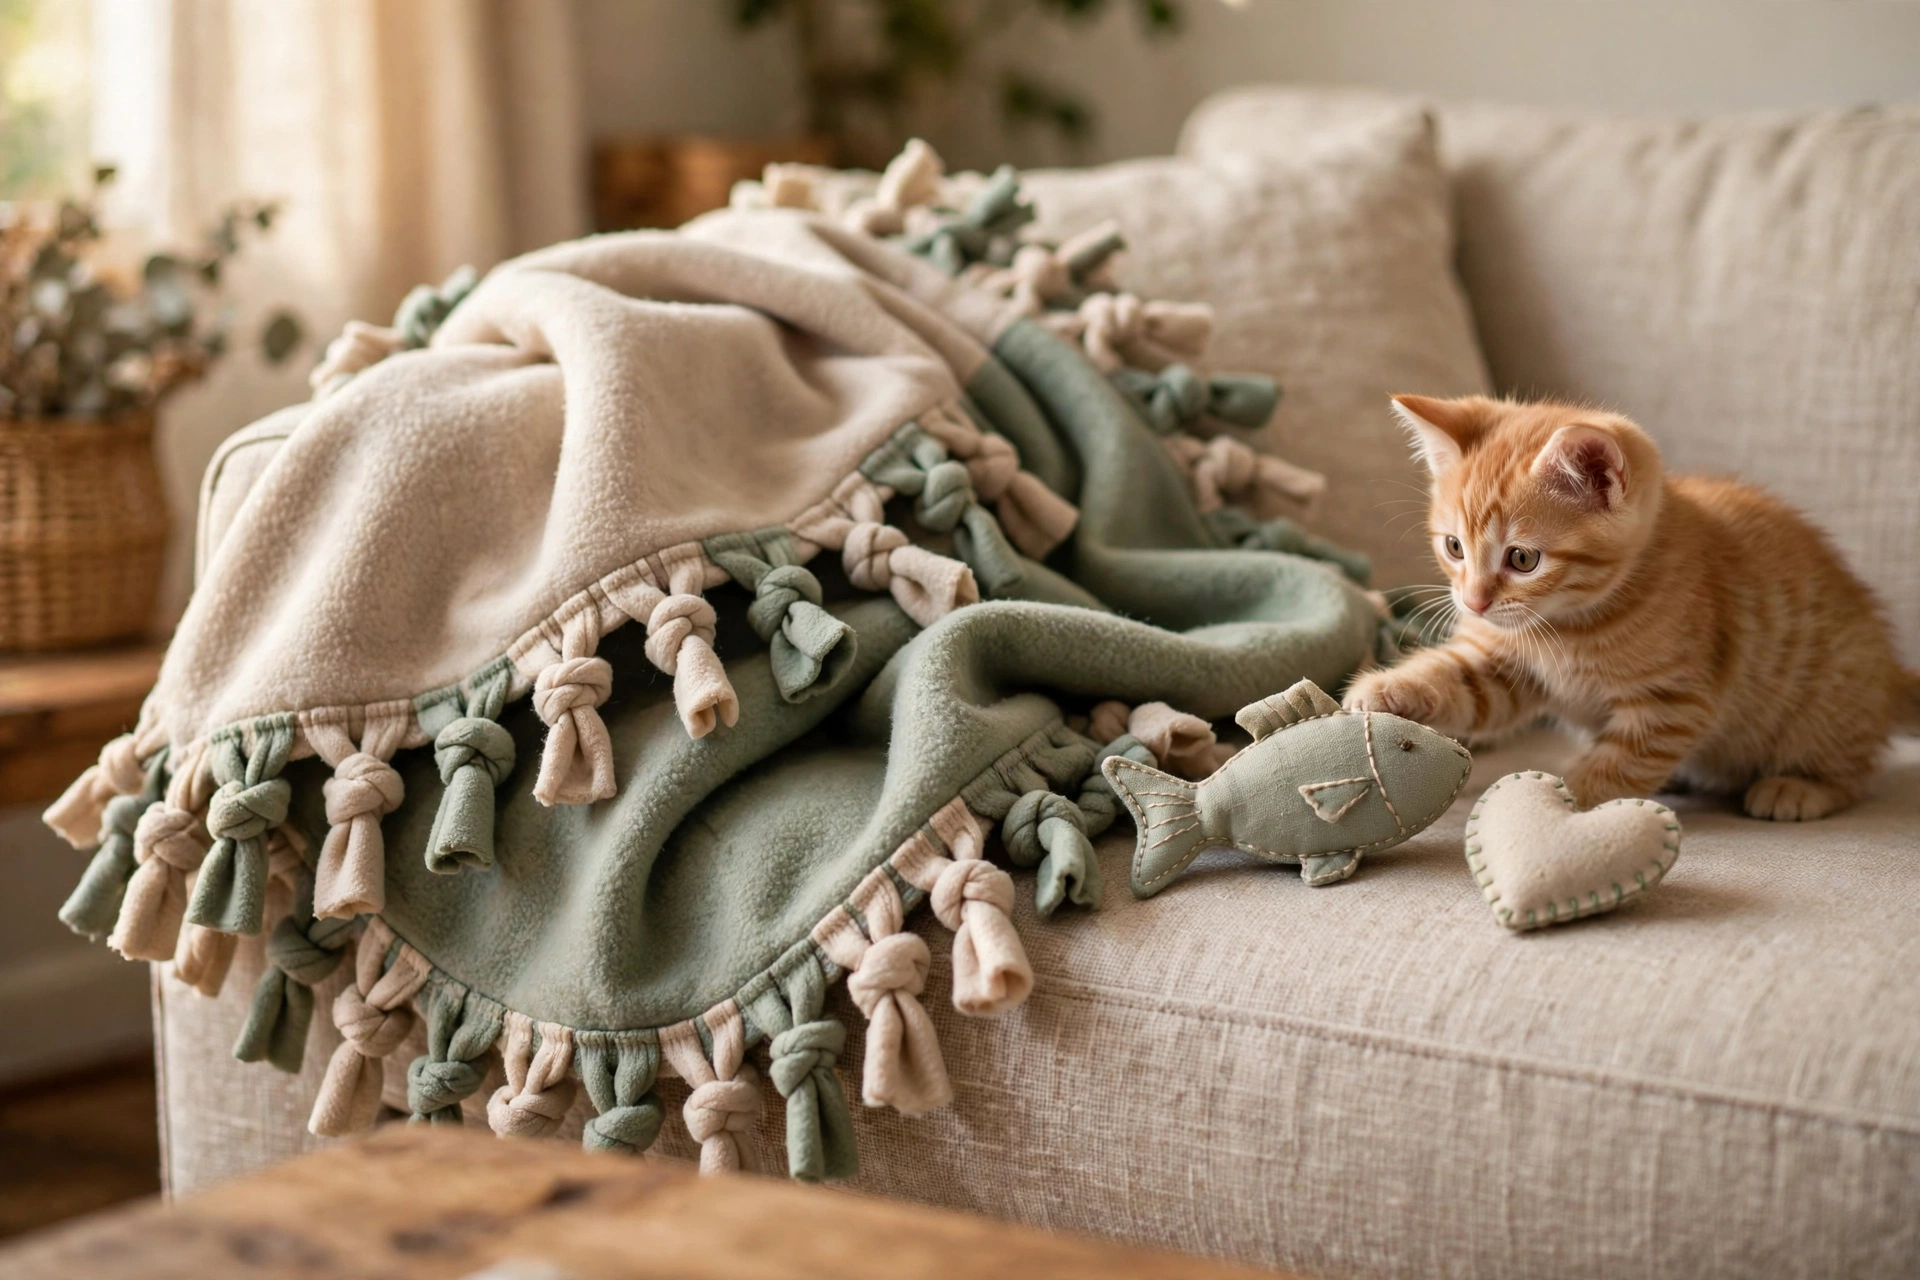
Not every project needs a drill. This no-sew set pairs a knotted-fringe fleece blanket your cat will knead into shape with two simple catnip toys, and the whole thing takes about an hour from a single yard of fabric.
Materials: one yard of anti-pill fleece, dried catnip, poly-fill stuffing, scissors, ruler.
Steps: Cut the fleece to size and cut 4-inch strips around all four edges, then tie each pair into double knots. Save the larger scraps: stack two pieces, cut fish or heart shapes, tie three sides with knots, stuff with catnip and poly-fill, then knot the last side. Squeeze the toys to wake up the catnip.
Time and difficulty: about 1 hour; beginner.
Tip: Refresh the toys with a tablespoon of new catnip every few months. The blanket never loses its charm, the toys just need refills.
Helpful pick: Yeowww! Organic Catnip — potent, stem-free catnip that makes handmade toys irresistible.
Keep Reading
- 7 DIY Outdoor Enclosures That Keep Cats Safe
- 16 DIY Cat Wall Ideas to Transform Your Space
- 12 Stylish Cat Box Ideas for Your Home
- 7 DIY Shelters That Help Stray Cats Survive Winter
- 7 Easy Cat DIY Crafts for Pet Lovers
Frequently Asked Questions
What is the easiest DIY project for a first-time cat owner?
The no-sew fleece blanket and catnip toy set takes about an hour with just scissors and fabric, and your cat will use both immediately.
How do I get my cat to actually use a new DIY scratching post?
Place it where your cat already scratches, rub catnip into the sisal, and reward the first few scratches with a treat.
Are cardboard box crafts safe for cats?
Yes, as long as you use bare corrugated boxes, keep paint on the outside walls only, and remove any tape or staples your cat could chew.
How much do these cat DIY projects cost?
Most builds land between $10 and $40 in materials, with the cardboard castle costing almost nothing if you have boxes at home.
What tools do I need for the wooden projects?
A drill, a jigsaw, sandpaper, a tape measure, and wood glue cover nearly everything here. The hammock side table only needs a drill and a screwdriver.
As an Amazon Associate, PetPostHub earns from qualifying purchases.



One Comment